


Most modern homes take advantage of newer fabrications and materials, including fiberglass or acrylic bathtubs instead of traditional ceramic-coated cast iron or stainless steel bathtubs. Fiberglass is affordable, beautiful, and durable, but it is prone to cracking and pitting over time.
This guide covers the basics of repairing all shower floors but focuses on the most common problem – fiberglass tub repair.
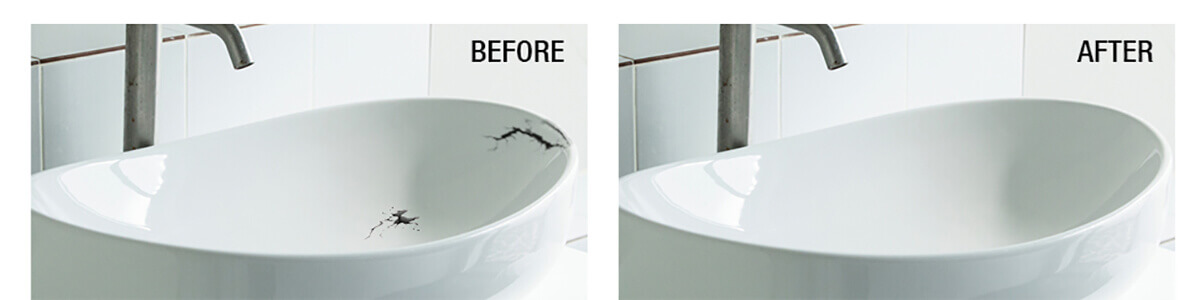
1. Fiberglass Bathtub Repair
No matter how severe a crack or indentation appears, the process is the same as forming a small crater. In either case, it’s very simple. Restoring a fiberglass tub only takes a day by using a basic epoxy kit with a few necessary items, most of which are spent while the compound dries.
(Looking for a reliable bathtub manufacturer? Your request will be met.)
1) Required materials and tools
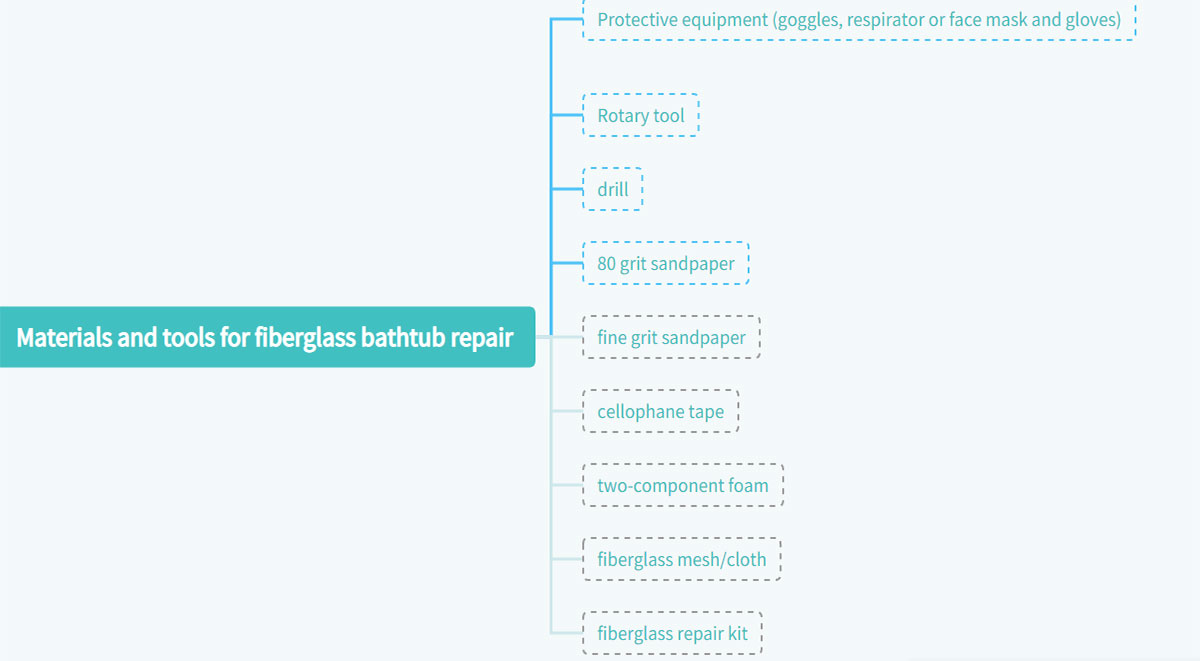
Generally speaking, this project requires minimal tools. First, you’ll need a household cleaner and sponge to clean the area before you begin. Additionally, you will need:
- Protective equipment (goggles, respirator or face mask and gloves)
- Rotary tool
- drill
- 80 grit sandpaper
- fine grit sandpaper
- cellophane tape
- two-component foam
- Fiberglass mesh/cloth
- fiberglass repair kit
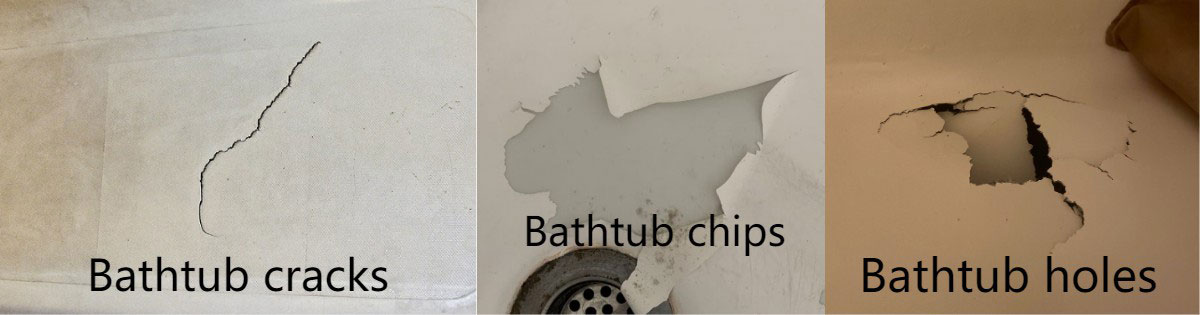
2) What type of repair? Cracks, chips, or holes?
Assessing the damage is the first step in determining the type of repairs needed. Over time, heavy use can make fiberglass, acrylic, and other tub and shower materials susceptible to cracking and chipping. Additionally, if something heavy is dropped on the surface, it can leave large cracks or holes, especially if the base is not properly supported.
Surface chips, cracks, and scratches may only require simple filling and repair. However, for larger structures, professionals should address potential underlying issues and add additional support to the structure before patching and refinishing the base.
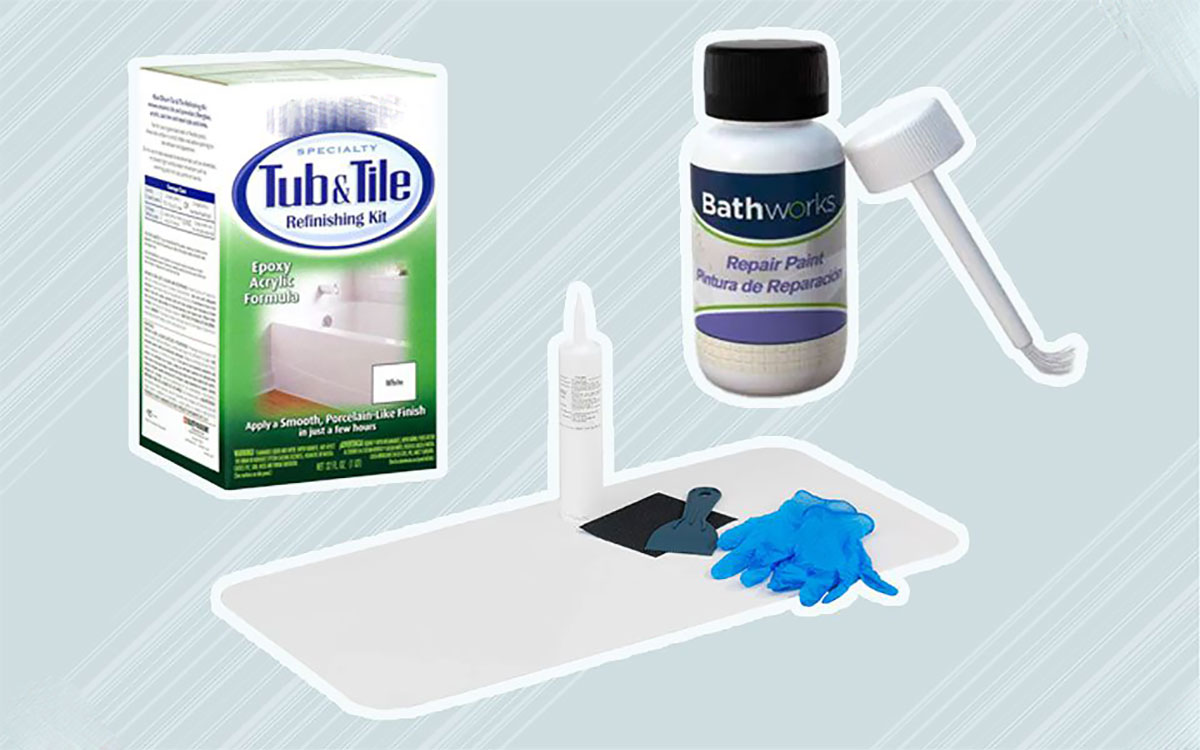
3) What to look for in a bathtub repair kit
To make your repairs simple and stress-free, look for an all-inclusive kit that includes everything you need to fix most problems. The kit includes at least:
- Putty or paste polyester resin/epoxy resin
- liquid hardener
- Mixing stick and tray or mat
- Sandpaper of various grits
- protective gloves
- If needed, stain in common tub colors (i.e. almond, off-white)
- Finishing and polishing
For larger cracks and dents, you may also want to purchase fiberglass mesh to reinforce the putty and make it less prone to dents. In general, use a mesh for any cracks wider than a quarter-inch or openings that are too large to be filled with resin mixture alone. Wider problems caused by improper installation and support may require drilling shallow holes in the tub, filling those holes with two-component foam, and adding a fiberglass patch before using a patch kit.
(Another related post: A Buying Guide for Freestanding Bathtubs)
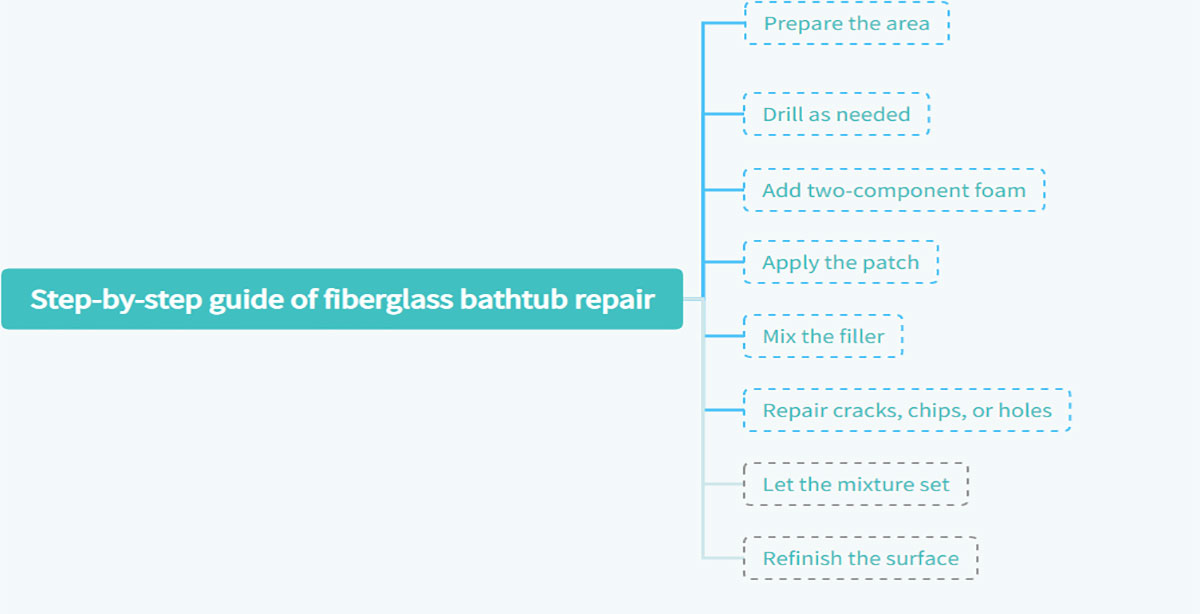
4) Step-by-step guide
Filling small holes or cracks in fiberglass is a simple process, but you should allow a full day to give the mixture time to harden between steps. So this is a good job to start in the morning and complete in between other home improvement projects. Acrylic tub repairs are similar, but we’ll cover the differences between the two processes below.
- Prepare the area – Before you begin, clean the area with a household cleaner and sponge. Use rubbing alcohol, acetone, or a similar solvent that can remove oil, soap scum, and fiberglass.
- Drill as needed – When a lack of support is the source of the problem, you need to address the issue head-on. Rather than dismantling the tub and rebuilding the support system, drill six to eight small holes in the tub and add foam (see next step). If you are not treating the underlying support but are instead repairing the crack, use a rotary tool with 80-grit sandpaper to create a bevel about 1 1/2 inches wide in the center of the crack.
- Add two-component foam – For extra support, inject two-component foam into the hole you drilled. It sets in minutes and creates a solid foundation.
- Apply the patch – If using fiberglass mesh, place it over the crack or hole to measure, then trim it so it is slightly larger than the opening you want to cover. For particularly deep holes, more than one layer may be required.
- Mix the filler – Wear protective gloves, follow the repair kit instructions to mix the resin putty and hardener, and add stain if using a non-white tub. Use the mixing wand and tray provided and place it on a piece of scrap cardboard to prevent accidental spills onto porous bathroom surfaces.
- Repair cracks, chips, or holes – Immediately apply the mixture to the crack or hole, or to the fiberglass mesh. Carefully place it thoroughly into all crevices and prevent dents. Don’t be afraid to pile the mixture over the hole to fill it completely; you’ll sand it later.
- Let the mixture set – Allow the mixture to set in the holes for 2-3 hours, longer for larger, deeper holes. Once set, use sandpaper to carefully smooth the surface. It may take some time and effort.
- Refinish the surface – Complete the refinishing with a polish to help the new area blend into the tub.
2. Repair Fiberglass Shower Pan
If you are repairing the floor of a fiberglass stall, the methods used to complete the patch are no different than those used to patch a larger tub. However, since most of the surface of the base is level and flat, scrap plywood can be used in addition to epoxy to secure and reinforce larger holes and dimples, but only if you have access to the back of the pot or bottom. Some quick steps are:
- Apply epoxy to the plywood and press it against the crack from the unexposed side of the pan to seal it.
- Apply a coat of epoxy to the exposed surface and then sand it.
1) Fiberglass bathtub care and maintenance tips
As with most household fixtures, preventing problems is the best solution when it comes to extending the life of your tub. Your first line of defense is to clean regularly using the right type of cleaner and method. This material works best with mild soap, such as dish soap, or even just a paste of baking soda and water. This is because the coating is thin and wears off over time. For the same reason, it’s important not to use abrasive cleaners on these fixtures.
To maintain the shine of your single or two-piece fiberglass tub, you may also consider polishing it regularly with an automotive finishing product designed specifically for fiberglass. Avoid using waxing products on such floors as this can pose a safety risk when using the shower.

(Another related post: Custom Bathtub: An Ultimate FAQ Guide)
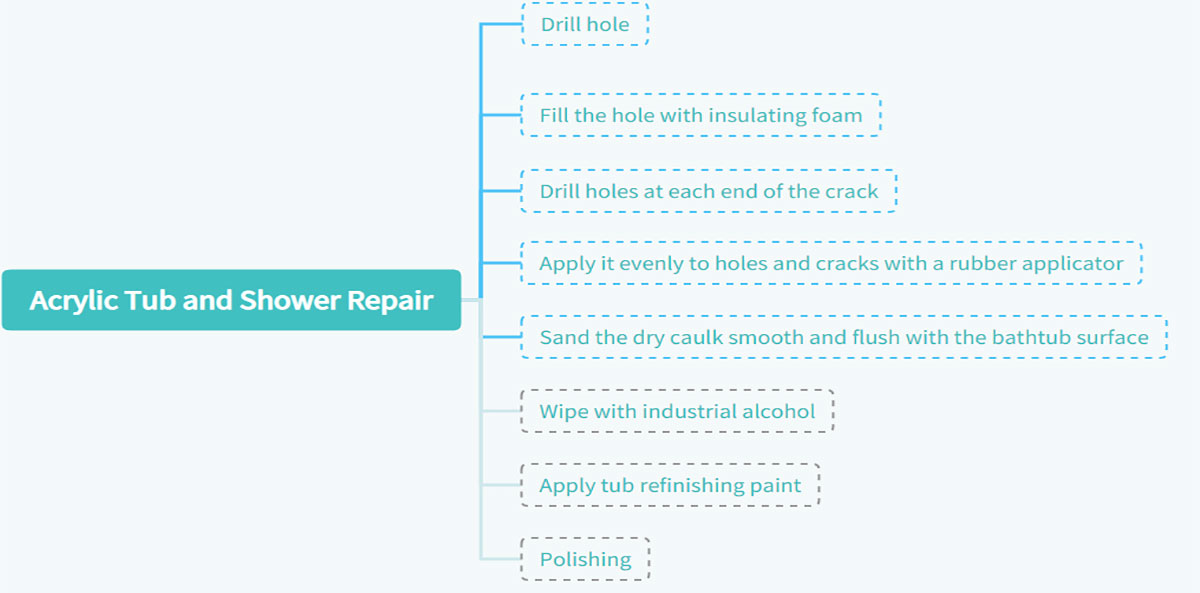
3. Acrylic Tub and Shower Repair
Acrylic is another common material that can often be repaired rather than replaced. There are slight differences between the steps.
- Drill a 1/4-inch hole within a 1-foot square of the damage, being careful to avoid drilling completely through.
- After repairing the crack, fill the hole with insulating foam to prevent the acrylic from buckling. Use a craft knife to remove any foam leaking from the holes, then sand the dry foam with 240-grade sandpaper.
- Drill holes at each end of the crack to avoid drilling through the acrylic.
- Repair damage with two-part polyester filler, applying it evenly to drilled holes and cracks with a rubber applicator.
- Once the filler is dry, sand it smooth and flush with the rest of the tub’s surface.
- Wipe the area with denatured alcohol to remove dust.
- Apply tub refinishing paint for a smooth, matching finish. Once the paint is dry, add a final coat of polyurethane compound and buff the area to create a smooth, hard surface.
4. How to Repair a Tile Shower Floor
If the crack is small, you may be able to repair it without paying the cost of repaving the area. Otherwise, you’ll need to remove the damaged tiles and replace them before regrouting.
1) Required tools and materials
- Grout saw
- Drilling holes with a masonry drill bit
- Chisel
- Scraper
- Serrated spatula
- Tile glue or thin glue
- Grouting
- Sponge/rag

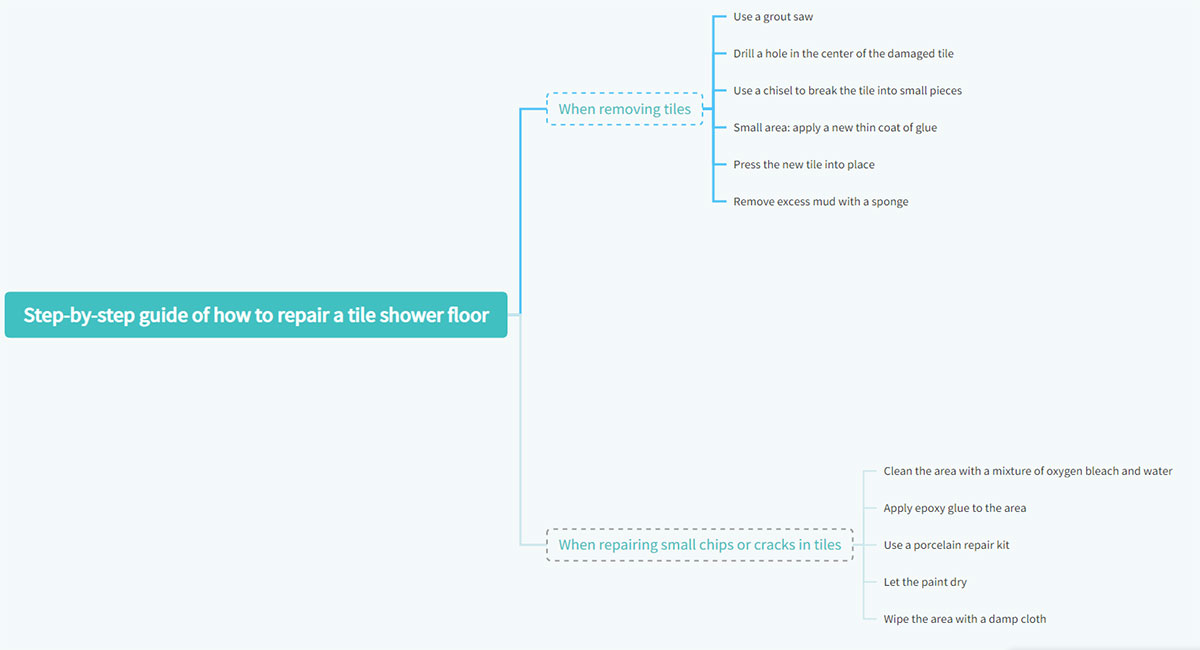
2) Step-by-step guide
When removing tiles,
- Use a grout saw to remove the grout around the affected tiles.
- Drill a hole in the center of the damaged tile, or drill several holes in larger tiles.
- Use a chisel to break the tile into small pieces, then use a scraper to remove it along with the sheet or tile adhesive behind the damaged tile.
- If you’re working in a small area, apply a new thin coat of glue or tile adhesive with a notched spatula or putty knife.
- Press the new tile into place, let the adhesive dry, and then grout the patch.
- To remove excess grout from tiles, dampen a sponge. Allow the grout to cure before using the shower.
When repairing small chips or cracks in tiles,
- Clean the area with a mixture of oxygen bleach and water.
- Apply epoxy glue to the area so that it is flush with the rest of the tile.
- Use a porcelain repair kit to paint the repair to match the undamaged tile.
- Let the paint dry and add a coat of clear polyurethane.
- Once everything is dry, wipe the area with a damp cloth.
(Another related post: Bathtub Refinishing VS. Bathtub Reglazing: What is the Difference?)
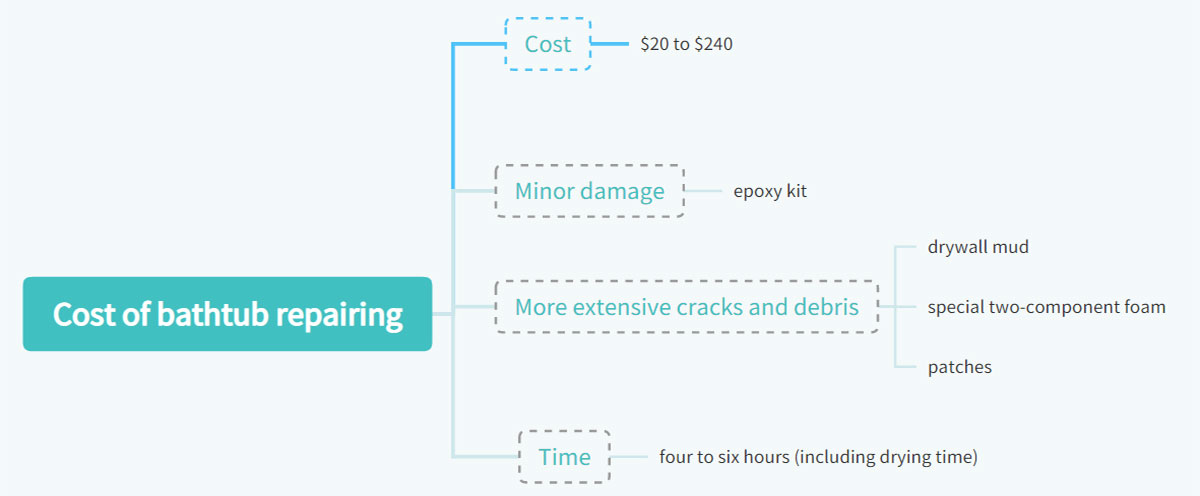
5. Cost of bathtub repairing
Fortunately, repairing a cracked or damaged tub or shower pan is a simple DIY job that most homeowners can do, saving them the cost of expensive replacements. The cost of hiring a professional to fix the problem may prove to be worth the small investment to ensure that the cause of the problem is addressed to prevent future problems.
The average cost of this project is $20 to $240, depending on the extent of the repairs needed and whether you hire a professional or repair the damage yourself. Minor damage usually only requires an epoxy kit, available at most home improvement stores. Cracks and chips that are more extensive may require drywall mud, special two-component foam, and patches. Even at the high end, repairs are much cheaper than installing a new tub, and typically only take four to six hours (including drying time).
6. DIY precautions
Depending on the extent of the damage, this is an easy DIY project. If you decide to do a DIY repair, be sure to allow enough time between steps for the epoxy and other materials used in the repair to dry. Additionally, consider covering areas outside of the surface you are working on with cellophane tape to prevent the refinishing material from flowing over the entire length of the tub or shower pan.
If you suspect cracks or holes are causing water damage in your subfloor, or if the project feels like it’s more than you can handle, hire a professional to do the job for you.
(Another related post: How to Install a Bathtub?)
7. Conclusion
This guide summarizes how to repair a crack in your bathtub and gives you the specific steps you need to follow to repair your bathtub yourself. Please contact Nicemoco if you have any further questions.