


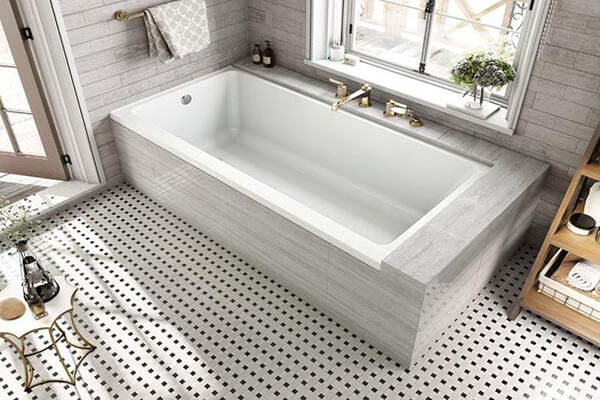
Upgrading your bathtub can greatly improve the appearance of your bathroom and your family’s comfort. For many people, removing a bathtub and installing a new one is an easy task. If you prepare carefully and work with an assistant, you can complete this DIY project in a day. This guide will teach you how to remove a bathtub and how to install it.
Tip: Wear safety glasses and work gloves when removing and replacing the tub. You may also need hearing protection, as the removal process can be noisy. You can dispose of your old tub by contacting your local sanitation or recycling company.
1. Choose your bathtub
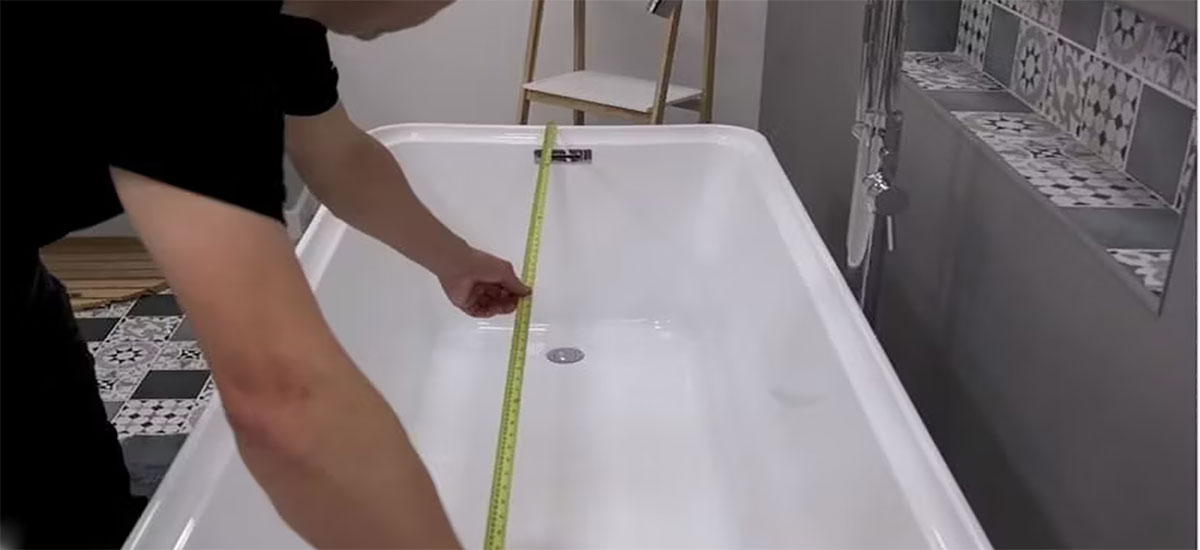
Before you begin, measure the shower wall around your current tub alcove. This will help you choose the right size tub for your space. Keep in mind that most standard bathtubs are 5 feet long and 30 or 32 inches wide. Due to shower walls (tiles, shower surround, etc.), your measurements will be slightly smaller than these numbers. You should choose the size that is closest to your measurements.
Next, determine the location of the tub drain. To get an idea of what type of tub you need, face the niche. The side on which the drain is fixed determines what type of tub you need. If the drain is on the left, look for the left drain bucket. If it’s on the right side, you’ll need a right-side drain.
(Another related post: Custom Bathtub: An Ultimate FAQ Guide)
2. Turn off the water
- Before proceeding with tub disassembly, turn off the water supply to the tub. If your bathroom does not have a separate shutoff valve, shut off the water to the entire house. Test that the water is turned off by turning on the bathtub faucet. Then, open the valve on the lower level of your home to relieve any remaining pressure in the pipes.
- This step is not necessary to replace the tub since there are no water lines connected. It ensures that the area and you stay dry if the valve accidentally bumps during the remaining steps.

3. Disconnect the drain flange and overflow cover
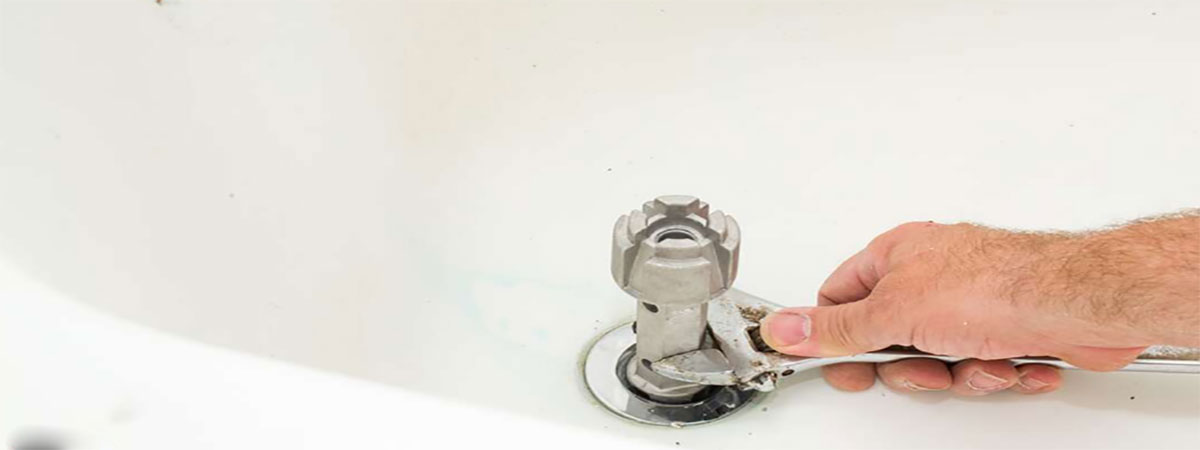
- The bathtub drain has different parts that need to be removed first, so the method for this step may vary. Some drains have a visible drain plug that can be unscrewed. This provides access to the drain flange at the bottom of the tub. Other drains do not have visible drain plugs, so the drain flange is already accessible.
- Remove the drain flange using a tool designed for removing tub drains, called a tub drain wrench.
- Use a screwdriver to disconnect and remove the tub’s waste valve and overflow valve cover.
- Remove the tub spout as it is on the part of the wall you want to cut away. Some nozzles have set screws to hold them in place. If you can’t find it, simply turn the nozzle counterclockwise to unscrew it.
4. Disconnect the drain assembly
Now, technically speaking, the tub no longer has a drain assembly. If they’ve been sitting there for a while, they may be stuck together with plumber’s putty or something similar. When you replace your old tub with a new one, it’s also a good time to update your tub drain assembly. It’s best to disconnect the rest of the drain assembly from the pipe below.
- To disconnect the drain, you need to get to the bottom of the tub. In many cases, there should be an access panel behind the wall. If not, you can cut away the drywall and patch it later. If you need to cut away drywall, cut away the flooring directly behind the overflow valve. If you can access the floor from below, access the gutters there instead.
- Use a pair of channel locking pliers to disconnect the drain pipe below the tee where the drain pipe and overflow valve meet. If the fitting on your bathtub drain is galvanized steel, first use a penetrating lubricant such as PB Blaster to loosen the joint.
- After loosening the nut connecting the drain pipe, unscrew it completely with your hands and take out the entire drain assembly.

(Another related post: How to Repair Chips & Cracks in Bathtub?)
5. Separate the tub from the wall
The tub attaches directly to the studs with a flange that tucks under the wall surrounding the tub—be it drywall, tile, tub surround, or something similar. Remove about 6 inches of material, all the way back to the stud. If you have a fiberglass tub surround, remove it first.
- Wear safety glasses and gloves. Cut a section of wall on each of the three sides of the tub and along the front of the tub, about 6 inches above the tub. To make repairing the wall easier, measure a standard distance from the top of the tub.
- Use a ruler to mark guidelines all around. If removing tiles, use a grout removal tool to cut along the grout lines and a stiff putty knife to pry the tiles apart. Then use a drywall saw to cut the drywall and remove the section between the pipe and tub all the way to the studs. If there is cement backing underneath the tile, score it repeatedly with a utility knife until you reach the studs. NOTE: Do not use a chainsaw as this releases harmful dust into the air. Clear everything away so you can use the screws or nails that attach the tub flange to the studs.
- Use a pry bar to remove any screws or nails around the front, top, and sides of the tub. Also, remove all moldings on both sides of the alcove.
- Use a utility knife to cut away any caulk between the tub and the floor.
6. Remove the bathtub
- Stay safe and get a helper for the next few steps.
- One person should lift the front edge of the tub while the other slides a few 1-by-4 boards underneath so it’s clear of the floor.
- Use a 1 x 4 board as a slide to slide the tub out of the alcove.
- Remove any stringer supports left on the wall. Stringers are the beams that support the edges of the tub.
- Now that the niche is exposed, clean the area and remove any remaining nails or debris.
(Another related post: Bathtub Refinishing VS. Bathtub Reglazing: What is the Difference?)
7. Get rid of your old bathtub
How to dispose of an old bathtub depends on the type of bathtub. Again, remember to wear protective gloves and goggles when disassembling the tub.
- Use a sledgehammer to smash the cast iron bucket. Do this in the bathroom so that the tub can be removed in sections. Use ear protection and use extreme caution when performing this task.
- All other types of tub materials are relatively lightweight. The entire tub can be removed with some help.
- Cut steel, composite, or fiberglass barrels with a reciprocating saw.
- Enamel steel drums should be treated as a whole.
Tip: Contact your local recycling center for details on how to dispose of your old bathtub.

(Another related post: Top 10 Bathtub Manufacturers in 2023)
8. Install the new bathtub in place
Before we cover how to install a new tub, inspect the unit and report any damage to the manufacturer.
- Your new bathtub (whether it’s ceramic or fiberglass) can get damaged, so take care of it until you’re ready to install it. Cut a section of cardboard to place inside the tub to protect the surface while you work. Also, use another piece of cardboard to protect the exposed porcelain side.
- Many new bathtubs have soundproofing and leveling pads on the bottom. The pad needs to rest completely on the subfloor.
- Make sure the subfloor is level and the tub can be securely mounted on it. If necessary, use a floor leveler to smooth the surface.
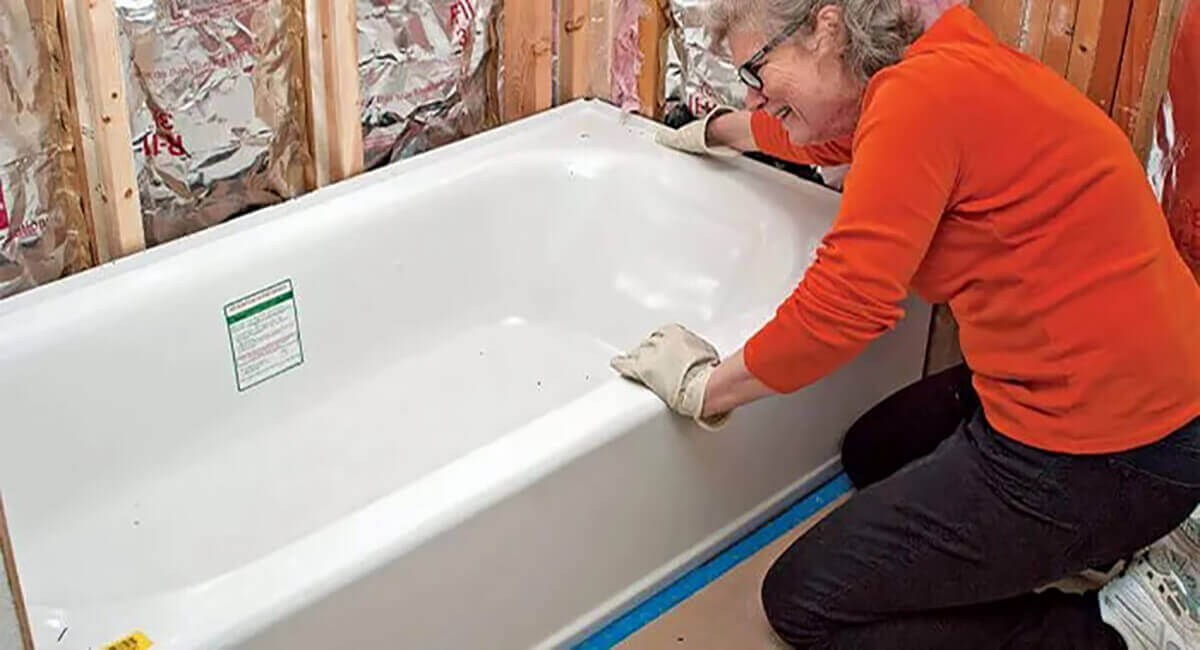
- Use an assistant to carefully place the tub on the skid and slide it into place in the alcove.
- Once in place, check that the tub is level. If necessary, use shims to smooth it out.
- Take a pencil and draw a guideline on three sides of the stud. Once this is done, remove the tub and set it aside.
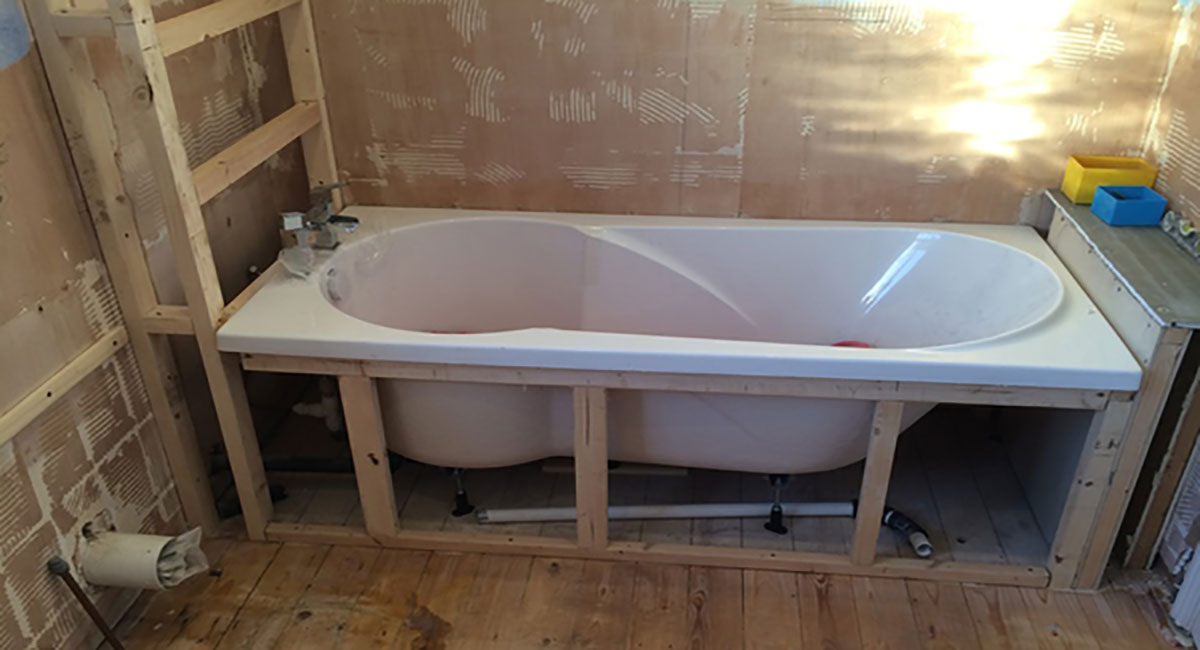
9. Install the longitudinal beams
2 x 4 stringers attached directly to the studs will help support the tub along its length.
- Since you already marked the top edge of the flange on the studs, you need to take the height of the flange into account before installing the stringer.
- Measure the height and measure the same distance below the reference line on each stud. This new mark will serve as the top edge of the stringer you want to install.
- Cut the length of the tub into 2 x 4 lengths. Use deck screws to secure it to the studs on the new reference mark.
(Another related post: A Complete Guide for Freestanding Tub)
10. Connect the overflow drain assembly
- To put in the drain, turn the tub on its side and install it according to the bathtub manufacturer’s instructions.
- Take a little plumber’s putty, roll it in your hand, and place it on the underside of the drain flange.
- Place the drain boot on the underside of the tub and screw the drain flange into the threads. Tighten it completely with a drain wrench tool and remove any excess putty.
- To attach the overflow valve, place the rubber gasket over the overflow elbow and position it behind the tub.
- Attach the cover plate inside the barrel to the overflow elbow and gasket behind the barrel using the screws provided in the overflow drain assembly kit.
- Connect the overflow pipe and drain pipe with a tee at the intersection.
- Install the drain filter onto the flange.
11. Connect the drain pipe
- Carefully move the tub back into place. When doing this, be sure not to damage the drain assembly you just attached. When it is in place, the flange should rest on the stringer just installed along the rear wall.
- Make sure the drain and overflow pipes coming out of the tub line up with the bathroom drain outlet.
- Connect the pipes and tighten them, but don’t overtighten them.
(Another related post: Bathtub Refinishing FAQ Guide)
12. Safe and done
- The top of the flange should line up with the reference marks you established earlier before securing the tub. If so, go ahead and secure the tub flange to the studs with roofing nails. If not, the stringer may be too high or too low; remove it, readjust, and reset the tub.
- Attach flanges to all three walls as well as the sides of the tub. Do not drill holes in the flange. Instead, use the heads of the fasteners to hold the flange down. Roofing nails are a good choice because they won’t rust. Galvanized screws can also be used with galvanized washers.
- Once the tub is in place, decorate the walls with drywall, tile, or tub surround.
- Reinstall the baseboard and complete the molding around and in front of the tub.
- Reinstall the nozzle.
- Be sure to turn the water back on, but wait 24 hours before using the tub.
- As a finishing touch, consider adding tile floors and backsplashes to the bathroom and tub.
13. Bathtub installation costs
The type of tub you choose and its surroundings have the biggest impact on cost. High-tech models cost more, and models made from high-end materials are also more expensive. Additionally, changes to plumbing and other fixtures will increase labor prices.
1) Cost by bathtub type
The type of tub determines the upfront purchase price as well as installation costs, as some tubs are more difficult to install. Standard tubs are the least expensive, and the price goes up as features are added.
- Universal Tubs: These are usually shallow alcove tubs surrounded on three sides by waterproof walls. They are often part of a tub-shower combination.
- Soaking Tubs: Soaking tubs are deeper than standard models, allowing adults to fully immerse themselves in the water. Clawfoot tubs and other freestanding bathtubs are types of soaking tubs.
- Jet tub or whirlpool tub: Jet tubs circulate water, creating a spa-like experience improving blood circulation, and reducing certain types of pain.
- Air Tubs: These tubs are similar to jet tubs but use pressurized air to create a gentler massage. They are in a similar price range to whirlpool tubs.
- Walk-in Tubs: Walk-in tubs are recommended for seniors or those with limited mobility. They have higher sides with doors that allow access without having to step over the sides. They typically allow the user to shower in a seated position and often include a handheld shower head.
- Hot Tub: A hot tub or jacuzzi is more commonly used for relaxation than bathing, but it is still a type of bathtub. Professional electrical and plumbing work makes this the most expensive type of bathtub to install.
(Another related post: Bathtub Buying Guide)
2) Cost divided by materials around the bathtub
Unless you choose a freestanding unit, you may need to install a new or upgraded surround on the wall around the tub. Most homeowners will choose a material that matches the tub, but metal is usually not used on the walls. Materials such as acrylic and fiberglass often come in prefabricated panels that are easy to install and maintain. Note that porcelain tile is one of the cheapest tiles to buy, but one of the most expensive to install as it is very time-consuming to lay and grout.
3) Labor costs
Bathtub installation is usually a job for a professional, and you’ll typically pay $500 to $2,000 for labor. Plumbers typically charge between $45 and $200 per hour, but some plumbers may charge a flat fee for tub installation. If you’re installing a bathtub with electronic controls, such as a whirlpool or air bath, you’ll also need to hire an electrician, which costs $40 to $100 an hour. If you choose to use a general contractor to oversee the project, be prepared to add 10 to 20 percent to the total cost.
4) Electrical upgrades
If your new bathtub requires electricity to run, you may need to spend $1,500 to $4,000 to upgrade your home’s electrical panel. Additionally, bathroom wet areas require ground fault connection circuit interrupters (GFCI) breakers to protect against electric shock. These usually cost $5 to $100 each. This electrical work requires hiring a licensed electrician.
5) Faucet upgrade
You may be able to use the faucets and other hardware from your existing tub, but you may need to upgrade them to match your new tub. Simple deck-mounted and wall-mounted faucets typically cost $100 to $500, but adding a floor-standing faucet to a freestanding tub can cost up to $700.
6) Old bathtub removal and material disposal
In addition to installing a new tub, you will also need to pay to remove the existing tub. Alcoves and freestanding tubs are the simplest and can cost as little as $200 to $300 to disassemble, while large or heavy tubs can cost up to $1,200. The cost may also depend on whether the tub replacement is part of a larger bathroom remodel.
7) Conversion from shower to bathtub
Converting a stall or walk-in shower into a bathtub often requires additional work, including moving or removing walls and relocating plumbing fixtures. The project typically costs $4,300 to $11,800, but enlarging the entire bathroom to accommodate the tub will cost more.
8) Subfloor and tub surround preparation
Acrylic and fiberglass tubs are lightweight, but if you choose metal or stone, you may need to reinforce the bathroom floors and joists, especially if the bathroom is on an upper level of the home. Even if you don’t switch to a heavier tub material than your old tub, the subfloor may need repair or additional waterproofing. The same goes for the walls around the tub, which need to be protected from moisture to prevent mold and mildew.
9) Water heater
Large bathtubs, especially whirlpool or jacuzzi tubs, may require a new water heater to handle the additional water volume. The tank should hold at least two-thirds the size of the tub for proper operation. Water heaters typically cost between $800 and $2,000.

(Another related post: A Buying Guide for Freestanding Bathtubs)
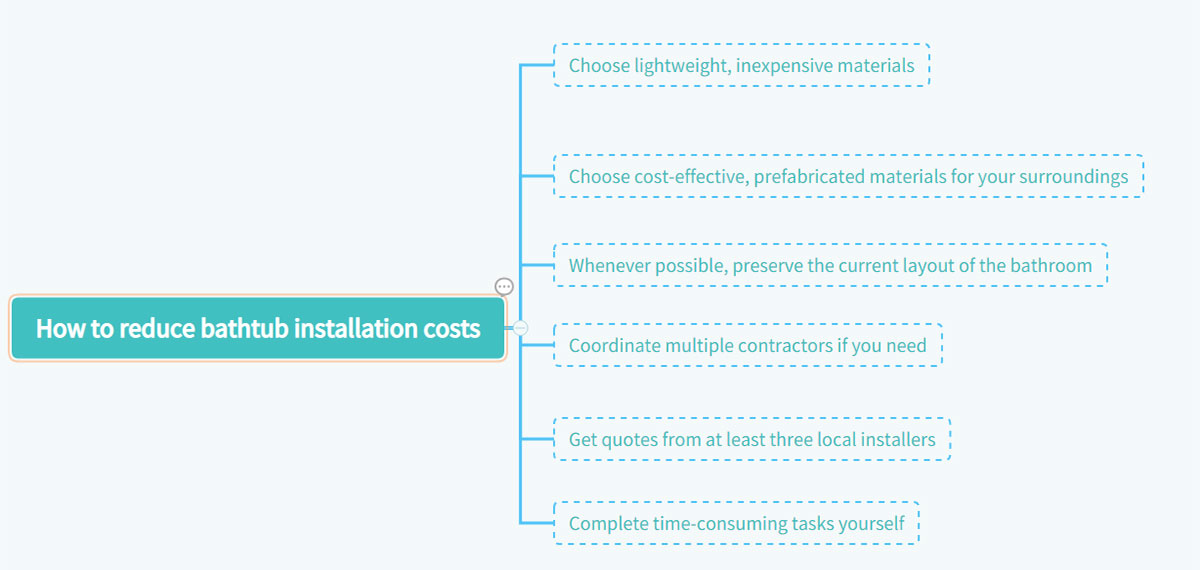
14. How to reduce bathtub installation costs
Even if you hire a professional contractor, you can still save on the cost of a new bathtub with the following tips.
- Choose lightweight, inexpensive materials such as acrylic, fiberglass, or steel.
- Choose cost-effective, prefabricated materials for your surroundings.
- Whenever possible, preserve the current layout of the bathroom, including walls and plumbing fixtures.
- Coordinate multiple contractors if your project requires multiple contractors.
- Get quotes from at least three local installers and ask about workmanship warranties.
- Complete time-consuming tasks yourself, including preparing, cleaning, or laying tiles.
15. Conclusion
This guide summarizes how to remove and install a bathtub and the costs of installing a bathtub. After reading this article, you will know how to DIY a new bathtub and how to save bathtub installation costs. If you want to ask any other questions, please feel free to contact Nicemoco.